Nature Print: Exploring the Art and Science Behind This Unique Technique
Share
Nature prints are a captivating way to bring the beauty of the outdoors into your space. These prints not only serve as stunning decor but also help you forge a deeper connection with the environment. Whether you’re drawn to the rich textures of leaves or the delicate shapes of flowers, nature prints can transform your home or office into a serene oasis.
Creating art from nature is a fascinating process that involves capturing the essence of organic materials. Techniques like sun printing allow you to use sunlight to develop beautiful, intricate designs that highlight the natural world. You can even explore a curated collection of such artwork that speaks to your personal style, enhancing your living environment.
At The Wild Rose Gallery, you can find a diverse range of nature-inspired prints that resonate with your individual taste. The perfect piece can elevate your decor while showcasing the unrivaled elegance of nature.
What Is a Nature Print?
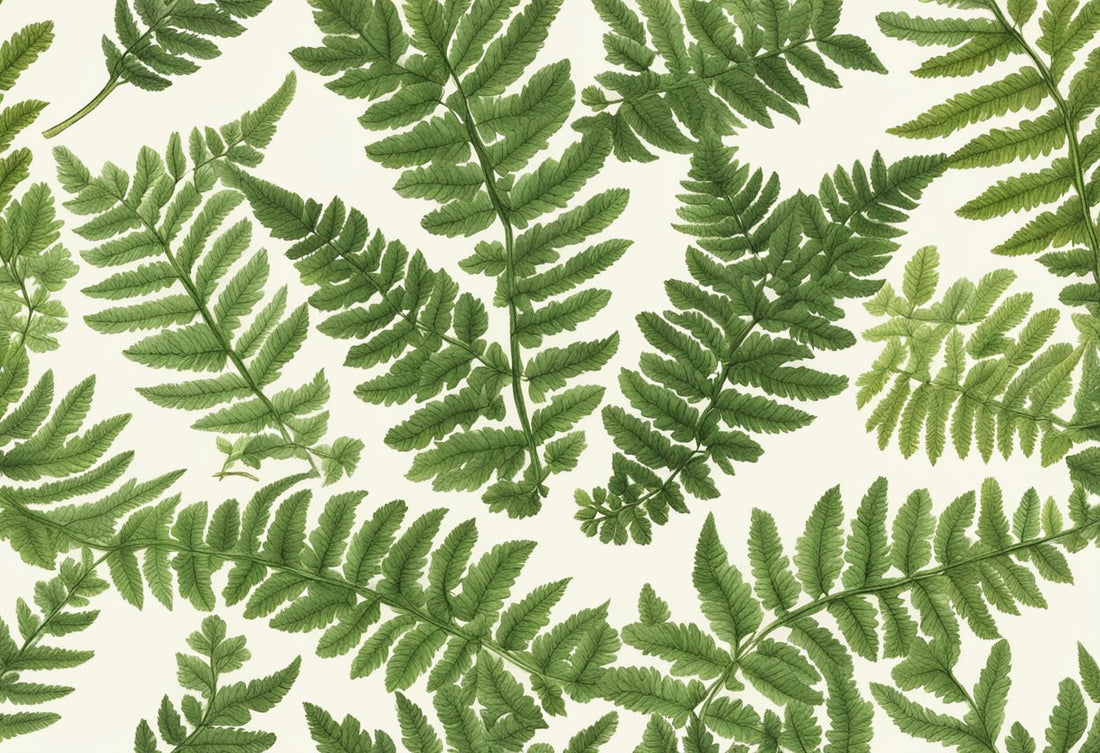
Nature prints are a unique form of artistic expression that capture the essence of natural objects through a specialized printing technique. This method results in highly detailed imagery, reflecting the shapes, textures, and colors of various organic materials.
Definition and Origins
Nature printing is a printing technique that uses real natural objects such as leaves, flowers, and even animal parts to create images. The process originated in the 18th century and was developed to produce accurate representations of flora and fauna. By utilizing the actual materials, artists were able to create lifelike impressions without the need for extensive drawing skills. This method was particularly popular among botanists and naturalists who sought to document the diverse species they encountered.
Historical Importance
Historically, nature printing played a crucial role in the scientific community. It facilitated the documentation of plant species in botanical books and catalogues. Artists and scientists, such as the renowned botanist Georg Dionysius Ehret, employed this technique to produce exquisite illustrations. These prints served not only as artistic expressions but also as important educational tools, allowing a wider audience to appreciate the intricacies of nature. Over time, the technique gained popularity in various artistic movements and influenced the evolution of printmaking.
Unique Characteristics
Nature prints stand out due to their distinctive style and technique. The process involves pressing the natural object onto a prepared surface, often using ink or dye, to capture its details. The results are one-of-a-kind images that cannot be replicated, making each print unique. This characteristic ensures that every piece you acquire has its own story to tell. The natural colors and textures retained in these prints reveal the beauty of the organic world in an authentic manner. Furthermore, using sustainable materials aligns with a growing appreciation for environmental consciousness in art.
Materials and Tools Required
To create stunning nature prints, you will need specific materials and tools. Each component plays a crucial role in achieving the desired results, from the paper you use to the objects you select for printing.
Nature Print Paper
The foundation of any nature print is the paper. Nature print paper, often referred to as sun print paper, is specially designed to react with sunlight. This type of paper is usually coated with light-sensitive chemicals.
When exposed to UV light, the coated areas will become darker, creating a stark contrast with your selected objects. You can find this type of paper at art supply stores or online retailers.
For best results, consider using age-resistant paper to ensure your prints last longer. The Wild Rose Gallery offers high-quality options that are perfect for this type of project.
Camera and Photo Negatives
Using a camera and photo negatives can enhance your nature printing experience. If you capture images of natural landscapes or objects, you can create photo negatives to use in your prints.
These negatives allow you to incorporate photographic details into your artwork, giving it depth and uniqueness. When using negatives, opt for clear images to ensure the final print retains clarity.
You can easily create negatives from your photographs with a standard printer or by using specialized services. This technique adds versatility to your prints, making them even more compelling.
UV Lamp Usage
A UV lamp serves as an alternative to sunlight when creating nature prints. This tool is especially useful for those in areas with limited sunlight or during overcast weather.
By positioning your nature print paper under a UV lamp, you can control exposure times and achieve consistent results. Ensure you follow the manufacturer's guidelines for best practices on distance and exposure duration.
With the right UV lamp, you can produce clear and vibrant prints quickly—ideal for those working in limited spaces or with time constraints.
Choosing Natural and Manmade Objects
Selecting the right objects is critical in nature printing. Natural objects, such as leaves, flowers, and branches, provide unique textures and shapes, contributing to an organic look.
You can also incorporate manmade objects like lace, fabric, or even stencils to create striking contrasts. Combining these elements allows you to explore various artistic styles, making each print distinctive.
When gathering your materials, consider their size and flexibility. Softer materials can yield better impressions, while rigid objects may provide more defined shapes. Balancing these options can enhance the overall impact of your print.
Step-By-Step Nature Print Process
Creating a nature print involves careful preparation and arrangement of materials. This process allows you to capture the beauty of natural objects and create unique artworks.
Preparing Materials
Start by gathering the essential materials. You will need:
- Natural objects: Fresh leaves, flowers, or other botanical materials work best. Choose those with intricate patterns or textures for more captivating prints.
- Paper: Use a high-quality, age-resistant paper for lasting results. Sheets should be large enough to accommodate the objects you plan to print.
- Ink or paint: Select water-based inks or eco-friendly paints to ensure vibrant and safe prints. You might consider using gel inks for smoother applications.
- Dabber or brayer: These tools help apply ink evenly on your chosen materials.
Setting up your workspace is crucial. Ensure you have a flat, clean surface to work on, and lay down some old newspaper to catch any ink spills.
Arranging Flowers and Objects
Once your materials are ready, experiment with the arrangement. Place your chosen flowers or leaves flat on the paper. You can overlap objects to create layered prints or use a single type for a uniform look.
Consider the orientation and placement of each item. You might want to press flowers slightly to release their natural oils, enhancing the print quality. Ensure there’s enough space between objects to prevent ink bleeding.
Before you proceed, take a moment to visualize the final composition. This step can help you with planning exact placements that will contribute to a balanced artwork.
Exposure Process Overview
Once everything is arranged, it’s time for the exposure process. This involves inking the surfaces of the arranged materials. Use your dabber or brayer to apply ink or paint directly to the leaves and flowers.
Carefully lift each item and press it onto the paper. Apply even pressure to ensure the details transfer well. Depending on your ink type, you may need to leave the print for a few moments to allow adequate exposure.
After pressing, carefully remove the natural materials, revealing your print. Allow it to dry completely before handling it further. This exposure process requires patience, as it is integral to achieving a high-quality nature print.
Exploring Techniques and Creative Applications
Nature printing offers diverse techniques and creative applications that allow you to capture the essence of the outdoors in your artistic endeavors. From vibrant color explorations to innovative crafts, each method taps into natural beauty and transforms it into unique artwork.
White on Blue Prints
White on blue prints, often achieved through cyanotype processes, are striking and ethereal. This technique involves placing plant materials directly on light-sensitive paper and exposing it to sunlight. The plants block the light, resulting in crisp, white silhouettes against a vibrant blue background.
To create your own, gather various leaves or flowers and lay them on pre-treated paper. Expose to sunlight for a few minutes, then rinse in water to stop the process. The outcome produces beautiful, botanical images perfect for framing or using in mixed media projects.
Nature Print Painting
Nature print painting merges traditional painting techniques with the natural forms of plants. You can use leaves, flowers, or even fruits to create textured prints. This method allows for a wide range of colors and designs, making each piece truly unique.
To start, apply paint directly to the plant surface. Then, press it onto your chosen paper or canvas. Experiment with different colors to achieve various effects. Incorporating layers can add depth, creating intricate designs that celebrate the beauty of nature.
Crafts and Artistic Uses
Nature printing extends beyond mere prints; it can be integrated into various crafts. You can create greeting cards, scrapbook pages, and unique home décor items by incorporating nature prints into your projects.
Using the prints as focal points, consider combining them with other materials like fabric or wood. Techniques like collage or decoupage work well to enrich the texture and visual interest. The versatility of nature prints makes them suitable for a range of artistic expressions, whether for functional decor or purely artistic statements.
Using nature's elements, you can foster creativity while making art that tells a story and connects viewers with the natural world.
Advanced Tips and Practical Considerations
When exploring nature print techniques, several advanced methods can elevate your results. Focusing on unique materials and combining natural elements with manmade ones can yield interesting effects. Below are some tips for utilizing corrugated cardboard, ice, and striking a balance between natural and artificial components.
Working With Corrugated Cardboard
Corrugated cardboard serves as an excellent base for nature printing. Its texture adds depth to prints. You can cut it into various shapes to create patterns or use it as a printing surface.
To prepare, soak the cardboard gently in water for several minutes. This will help the fibers absorb pigment more effectively. Use non-toxic inks or dyes to maintain a natural look.
When pressing materials like leaves or flowers onto the cardboard, apply even pressure. You can use a brayer for a uniform transfer of pigment.
Experiment with layering techniques; applying multiple prints can create complexity and dimension. Always allow the prints to dry completely before using them.
Using Ice for Unique Effects
Incorporating ice into your nature printing process adds an element of surprise. You can freeze natural items alongside your paper or fabric. As the ice melts, it releases pigment and creates soft, organic patterns.
Begin by placing a layer of water in a shallow tray and add leaves, flowers, or even small objects. Freeze the setup overnight. Once frozen, place your paper on top and allow the ice to melt.
This method can create unpredictable but stunning results. The drips and run-off from melting ice will blend colors and introduce delicate lines. Just be prepared for variations in outcome; each print will be unique.
Balancing Natural and Artificial Materials
Combining natural and manmade materials can enhance your prints. For instance, elements like metal or plastic can create striking contrasts with organic materials.
Consider using synthetic inks that allow for vibrant colors while retaining the structure of natural items. Using items like plastic stencils can add layers to your work.
You might also experiment with texture; fabrics, papers, and cardboard can bring depth and interest. When balancing these components, think about how each element interacts visually and texturally.
Your approach should enhance the natural aspect of your prints while allowing for creativity. This balance can lead to a more engaging final piece, showcasing both nature and human innovation.
Frequently Asked Questions
When selecting nature prints for your space, there are several key aspects to consider, including mounting techniques, size, and aesthetic compatibility. This section addresses common queries to help you make informed decisions.
What are the best methods for mounting nature posters without damaging walls?
To protect your walls while displaying nature posters, consider using removable adhesive strips or magnetic mounting systems. These options are gentle on surfaces and allow for easy repositioning. Another method is using frames, which can provide support and enhance the visual appeal without direct wall contact.
How do I choose the appropriate size for a nature print in my living room?
The size of your nature print should complement your living room's scale. Measure available wall space, and consider how the print interacts with existing furniture. Larger prints can act as focal points, while smaller pieces can be grouped to create a gallery effect.
What should I look for when selecting educational nature posters for a classroom?
Choose educational nature posters that are visually engaging and informative. Look for high-quality images with clear text that covers relevant topics. Additionally, ensure that the designs are suitable for the age group of your students. This can enhance both learning and aesthetic value.
Where can I find vintage-style nature prints?
To discover vintage-style nature prints, explore online marketplaces and art galleries that specialize in retro art. You can also check thrift stores or antique shops for unique finds. Many digital platforms offer reproduction prints of classic artworks, allowing you to achieve that vintage look.
Can you recommend techniques for creating nature-inspired print art at home?
Experimenting with nature-inspired print art at home can be rewarding. Techniques such as leaf printing or using natural dyes on fabric can yield unique results. You might also consider photography of local flora and fauna, which can be digitally printed for a personalized touch.
What types of nature wall art are most suitable for a modern aesthetic?
For a modern aesthetic, choose nature wall art that emphasizes minimalism and clean lines. Abstract representations or monochromatic prints can blend seamlessly into contemporary spaces. Focus on bold colors or stark contrasts to make a striking impact without overwhelming the environment.